Violin Bow - Color your Violin Sound by Bowing on Different Contact Points
By Zlata Brouwer
Bowing on another place on your string makes your violin sound different
The beautiful thing about violin playing is that you can create variety in your tone. Playing on different contact point enhances your dynamics and expression. On a piano, you can only suggest variety in sound. On the violin, you’re free to choose a warmer or clearer sound. You want something to sound romantic or even aggressive.
How do you make different sound colors on the violin?
One of the ways is to change the contact point: the place where your violin bow touches the string. A prerequisite is that you can bow absolutely straight with a regular tone. When you don’t have control over bowing straight, you don’t have control over your contact point and the sound you create.
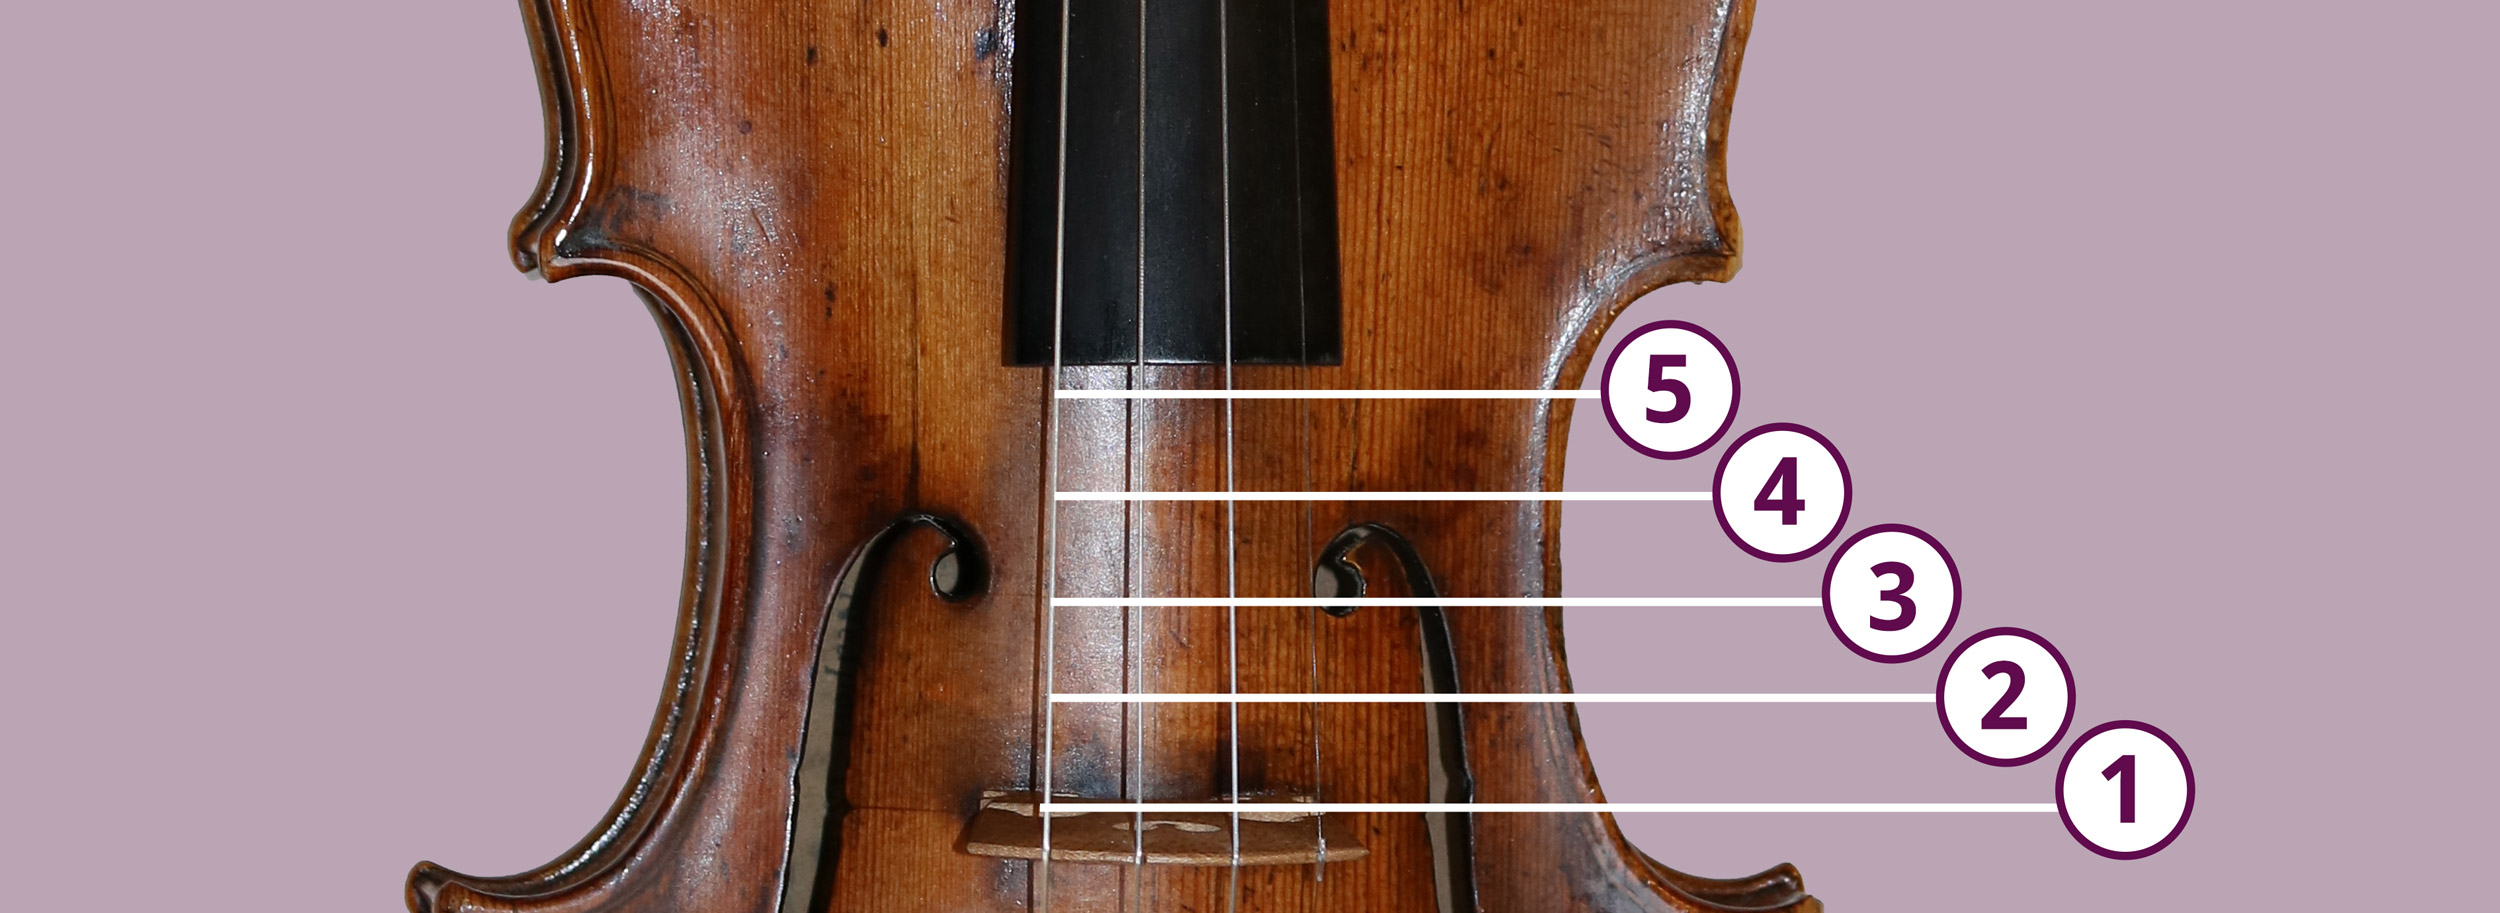
Officialy there are five contact points on the violin
At least take care that you can control all five. However know that coloring your sound and musical expression is an organic thing. It’s not about ‘shifting gear’ between the contact points. You can use an endless variation of contactpoints and vary within one bow stroke.
What place of the string gives the optimal sound?
Your violin sounds best at about 1/9 to 1/10 of the vibrating string length from the bridge. Related to the harmonic series, this is the optimal place to bow.
By bowing on another spot, you can amplify the pure tones or mute them.
Close to the bridge (sul ponticello) there are more harmonic pure tones above the note, so you get a glassy bright sound.
Close to or above the bridge (sul tasto) these harmonics are muted a bit and you get a more mellow vague sound. Some call this flautato, but it’s also possible to play flautato with a high bow speed and little pressure.
When to use which contact point?
There are three factors to keep in mind:
- Duration
- Dynamics
- Position
Long and loud notes are played closer to the bridge. Short tones with a lot of bow are played closer to the fingerboard.
In higher positions the contact point is closer to the bridge, as the optimal 1/9 of the vibrating string lengt is smaller in high position.
At a contact point closer to the bridge, your string will offer more resistance to the violin bow. You have to use more weight at these contact points. On the E string this is most of the times not necessary. To get a clear articulation, use more pressure with your left hand fingers.
How to practice changes in contact points?
When this concept is new to you, you can experiment in front of the mirror. Bow on open strings and discover the different sound colors.
You should know at what contact point you’re bowing without looking. Practice until you’re able to bow on all five contact points with a straight bow and a healthy tone.
Dynamics exercise with contact point changes. Play scales and arpeggio’s crescendo and decrescendo. Get used to changing dynamics only by changing the contact point.
This dynamics exercise is bit more difficult when you play scales and arpeggio’s on one string: you need to adjust your contact point to the position in which you’re playing.
Apply changes in contact points in the music you play. Discover the difference in tone you can make. Combine this with different ways of tone creation, like vibrato, weight, bow division, left hand articulation and bow speed.
Want to find out more?
As a violin teacher specialized in bowing technique and tone creation I teach violin players world wide how to express themselves in music to touch people’s hearts with their melodic beautiful violin playing. I think the violin is built to be the voice of your Soul.
As musiMentor for iClassical Academy I created an exclusive course called "Upgrade your Bow Technique". Find it here.
Looking forward meeting you there soon!